One of the most popular articles I’ve written on this blog was this tutorial showing how to deploy Selenium Grid 3 to Azure Kubernetes Service, Selenium Grid 4 is now in beta and has been rewritten from scratch so there are some big changes which you need to be aware of when deploying to Kubernetes. This article will explain some of the changes between Grid 3 and 4 and guide you through deploying Grid 4 to your AKS instance using Azure Pipelines.
Before we get started I am going to assume you have a running AKS instance with a functioning ingress controller, if you don’t then you can follow the following tutorials to get up and running – Deploying an Azure Kubernetes Service (AKS) instance with an Nginx ingress controller and Updating an AKS Nginx ingress controller using Azure DevOps pipelines. It’s also beneficial to have kubectl installed locally and configured.
Let’s firstly look at some of the differences between Grid 3 and 4. Selenium Grid 3 had two types of components: Hub and Node. The hub would forward test jobs onto the nodes and the nodes would execute the tests, you would have one hub and then many nodes.

With Selenium Grid 4 things are a bit different, the hub has now gone and in it’s place we have the following components:
- Router
- Distributor
- Session Map
- Session Queue
- Event Bus

I’m not going to go into detail about how Grid 4 works with the new components but if you are interested it’s all documented here. Due to the additional components this makes it a little trickier to deploy but it’s not too bad once you get your head around it. Let’s get onto deployment!
I’m going to be using Helm to deploy the Grid 4 components using Azure DevOps. I’m only using Azure DevOps as it’s what I’m familiar with however the concept is the same if you are using GitHub Actions or any other CI/CD system.
To deploy the components using Helm we need Helm charts for each component, if you navigate to the following GitHub repo I have already constructed all the charts we are going to need. That repo also contains the pipeline for deploying so it should just be a case of configuring Azure DevOps and pointing it at our files and pipeline. I’d recommend forking that GitHub repo if you want to follow along easily.
Let’s head over to Azure DevOps and make a new project, once your project has initialised press the Project Settings cog in the bottom left and navigate to ‘Service connections’, then press ‘New service connection’ in the top right.
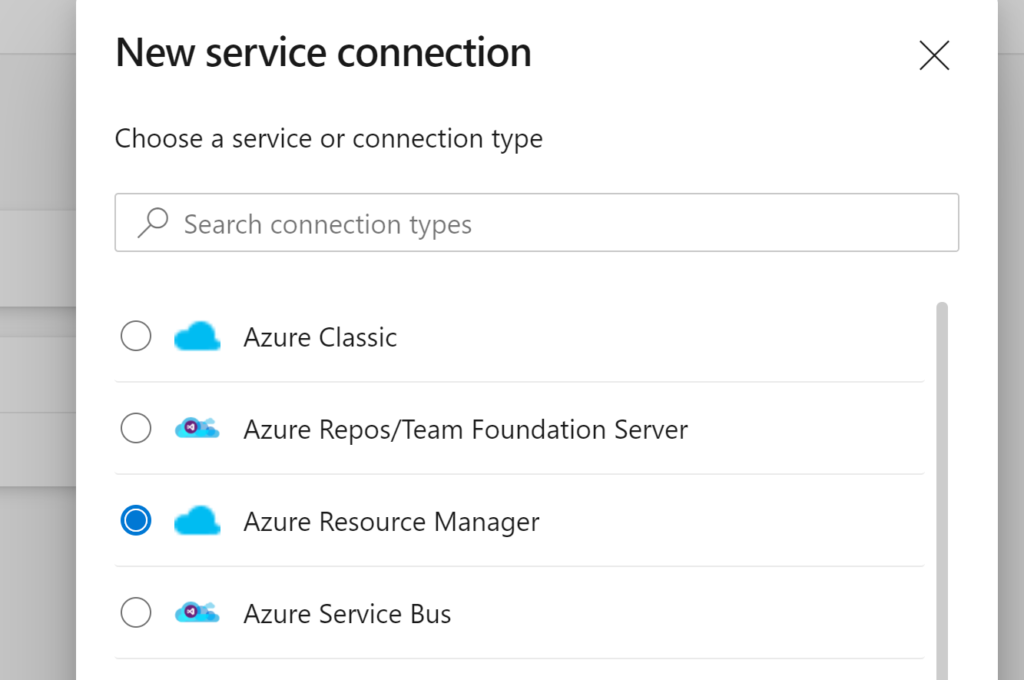
Select ‘Azure Resource Manager’ and press ‘Next’. Leave authentication method at ‘Service principal’ and press ‘Next’ again.
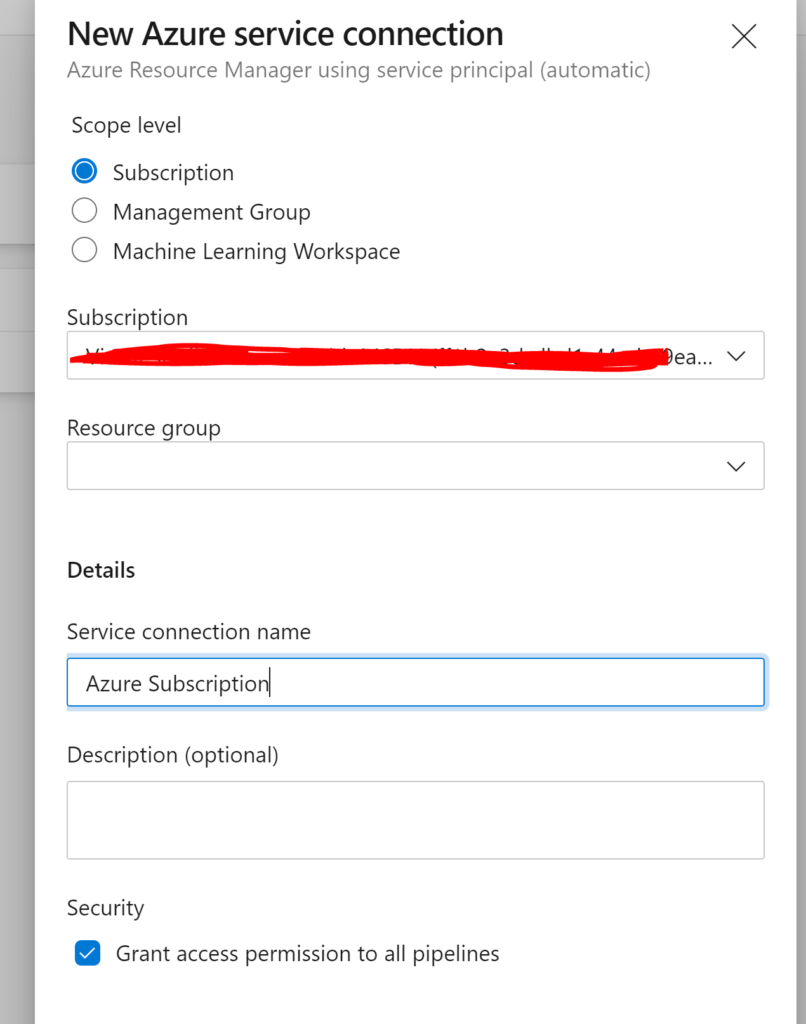
We now need to connect to our Azure subscription so leave ‘Scope level’ at ‘Subscription and select your Azure Subscription from the drop down. Leave ‘Resource Group’ blank and set the service connection name. Finally press ‘Save’
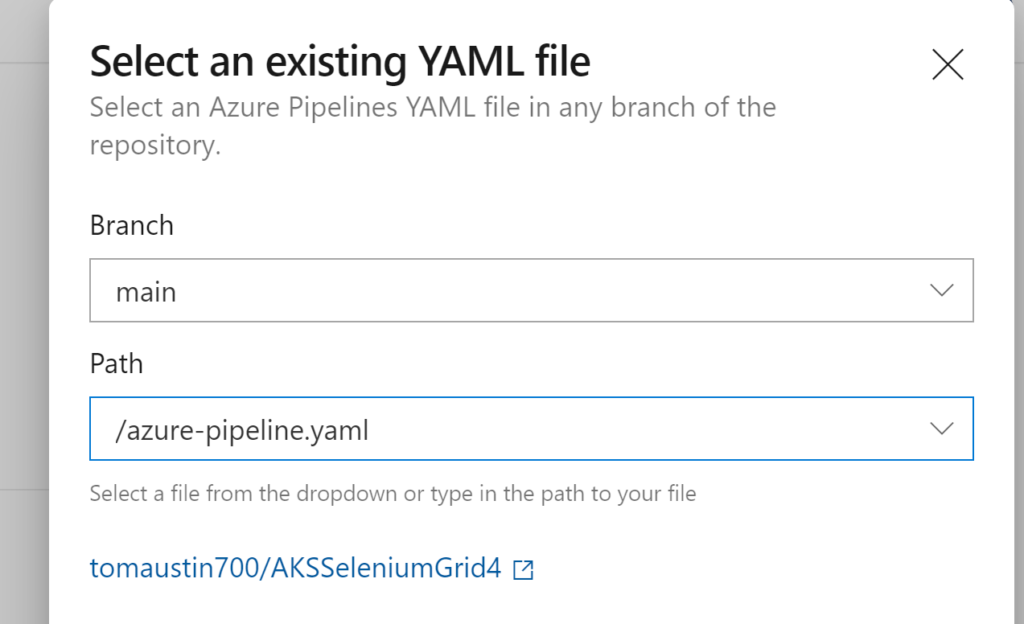
Now we just need to add the pipeline so head over to Azure Pipelines by pressing the Pipeline button on the left. Once you’re on Pipelines press ‘New pipeline’ in the top right. Select the location of your code (in my case GitHub) and select the repository. When prompted to configure the pipeline select ‘Existing Azure Pipelines YAML file’ and select your pipeline file before pressing ‘Continue’.
You should now see your YAML pipeline file. You may need to make a few changes to this depending on your Azure service connection name you set earlier, Azure Resource Group name and AKS instance name. Update the following variables on each task to match yours:
        azureSubscriptionEndpoint: 'Azure'
        azureResourceGroup: aksselgrig4test
        kubernetesCluster: aksselgrid4
Make sure to update these variables on each task, you could potentially declare them in the ‘variables’ section to make things slightly easier but I haven’t. Also make sure to update the namespace variable to match the namespace you want to deploy Selenium Grid 4 to within your AKS instance. Once you’ve finished configuring your pipeline you should be able to run it and everything should deploy.
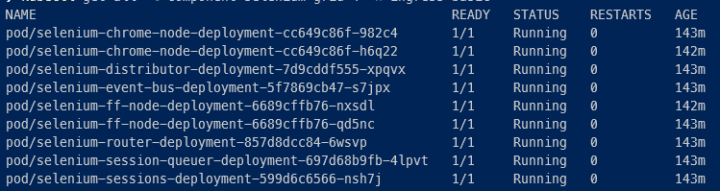
If you have kubectl installed locally and configured you can run the following command to list all the components that we just deployed.
kubectl get all -l component=selenium-grid-4 -n ingress-basicWith any luck you should be able to see everything running correctly.

Now the only thing left to do is configure your ingress controller to allow access to selenium-router. I’m using an nginx ingress controller so I applied the following config using kubectl, you could also do with with an Azure DevOps pipeline as seen here – I’d recommend you do it this way if running in prod.
apiVersion: extensions/v1beta1
kind: Ingress
metadata:
  name: ingress
  namespace: ingress-basic
  annotations:
    kubernetes.io/ingress.class: nginx
    nginx.ingress.kubernetes.io/use-regex: "true"
    nginx.ingress.kubernetes.io/rewrite-target: /$2
spec:
  rules:
  - host: youraksinstancehostnamegoeshere
    http:
      paths:
      - path: /grid(/|$)(.*)
        backend:
          serviceName: selenium-router
          servicePort: 4444
      - path: /
        backend:
          serviceName: helloworld
          servicePort: 80
There are a few things to note in the config. Firstly make sure to update the host to match the hostname of your AKS instance. Also I already had a service running in my AKS instance that had a rule so I needed to add another for Selenium Grid, I used an ingress rule rewrite annotation in the path which you may also need to do if you have other services on your AKS instance.
Once you’ve applied that configuration you can use Postman to check everything is running correctly. Simply do an HTTP GET request to the hostname of your AKS instance followed by /status. You should get a response with ‘ready: true’ and info about your nodes. You should be able to start running tests on Grid. Something to note is that the url for running tests has changed between Grid 3 and Grid 4: the Grid 3 used to be hostname/wd/hub whereas now you don’t need the /wd/hub portion.
That concludes this tutorial and you should now have Grid 4 deployed to AKS using an Azure DevOps pipeline. If you have any issues or queries please leave a comment or contact me on Twitter. Thanks
Hello Tom, Thank you for this awesome tutorial.
I already deploy Selenium Grid in my env, but how can I access the Selenium UI to check nodes working?
Regards.
Hi,
Currently Selenium Grid 4 doesn’t have a UI. You can check the nodes are working using a REST client and doing a HTTP Get at your endpoint followed by /status.