This article focuses on deploying Selenium Grid 3 which is now obsolete please see the following article which shows the same deployment process for Selenium Grid 4.
I’ve recently started using Selenium for UI testing some web applications and I kept seeing Selenium Grid being mentioned so decided to take a look at it. For those of you who don’t know about Selenium Grid it allows you to distribute your tests over several machines by sending your tests to a ‘hub’ which will then distribute your tests for you over your ‘nodes’. The thing that really interested me about this was that everything could be run from Docker containers so within a few minutes I had all the infrastructure running locally via a compose file. This is all well and good but what if we wanted to have more than a handful nodes? AKS seemed like a good fit.
Before we start I’m going to presume you already have an AKS instance running with an ingress controller deployed, it would also be good if you were also familiar with kubectl (for debugging more than anything). One thing to be aware of is that each node container requires about 1GB of RAM so if you intend on running a lot you’re going to need a pretty powerful AKS instance. I have vm size set to B2ms for the instances within the scale set but even this won’t be enough if you want to run more than a few nodes.
Luckily for us Selenium already have Docker containers for the hub and the nodes so all we really need to do is deploy them to AKS. For this I’m going to be using Helm 3 as it’s quick and easy. We are going to need to Helm charts to deploy but I’ve already done the hard work and built those, you can find them on my GitHub here. If you do intend on using my charts then you’re probably going to want to Fork the repo so you can tweak the replica count for yourself.
Let’s go to Azure DevOps and create a new project. Once completed we are going to want to build a pipeline and a release process. The pipeline will publish the charts and the release process will deploy the charts to AKS. Go to Pipelines and select the ‘New pipeline’ button in the top right. I’m going to be using the classic pipeline editor as it’s a bit easier to follow along with so select ‘Use the classic editor’ at the bottom.
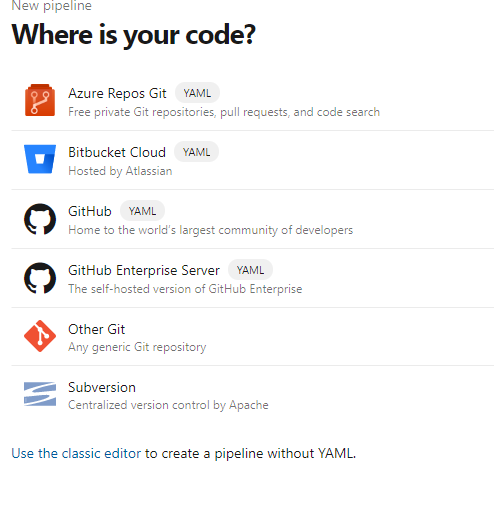
On the next page select GitHub as your source and select the Repository you cloned earlier.

When prompted to select a template just click ‘Empty job’. We are only going to need one build task so no templates are required! Add the ‘Publish build artifacts’ task and configure it to match the screenshot below.

That’s pretty much it for the pipeline. You may want to turn on continuous integration if you want any changes to auto deploy (Triggers > Enable continuous integration). Lets hit ‘Save & queue’ and hopefully after a few seconds the pipeline will complete with a nice green tick.
Now let’s add a Release pipeline to deploy our charts. Click Releases and select click the + New button, then select ‘New release pipeline’. When prompted select ‘Empty job’ like we did before. To start let’s add an artifact so click ‘Add an artifact’ and select your build pipeline for the Source, it should auto-populate the rest of the fields and then click Add.

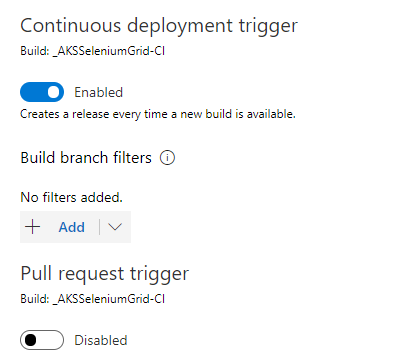
At this point I always enable continuous deployment so click the trigger button (lightning bolt) and Enable the deployment. This will automatically deploy our Helm charts whenever new build artifacts are published.
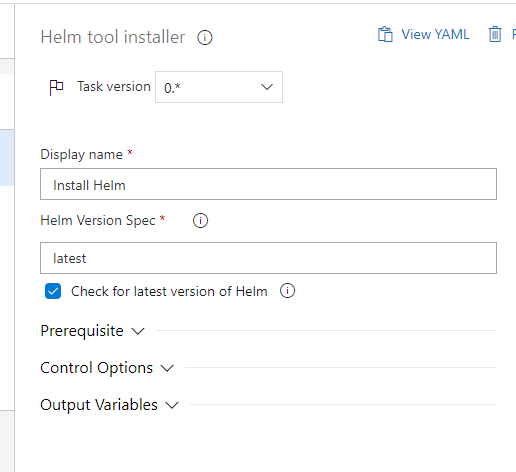
All we have to do now if add a few tasks to do the deployment. Start with clicking ‘1 job’ under Stage 1, this should open the stage tasks page. The first task we are going to add is ‘Helm tool installer’, this will install Helm onto the build agent and allow it to deploy our charts. When the task is added it will default the Helm Version Spec to ‘2.14.1’, we are going to want to change this as we are going to want to use Helm 3 (Helm 3 has been released for a few months now and makes things a lot easier) so set it to latest.
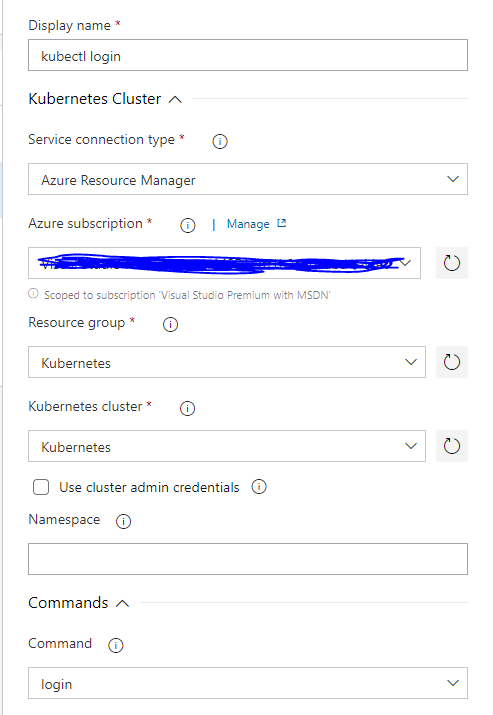
Next add a Kubectl task, this will deal with the authentication between the pipeline and our AKS instance. Set the ‘Service connection type’ to ‘Azure Resource Manager’ and select your Azure subscription (you may need to authorise it), once selected you should be able to select your Resource group and your cluster. The last thing to do is set the ‘Command’ box to login.
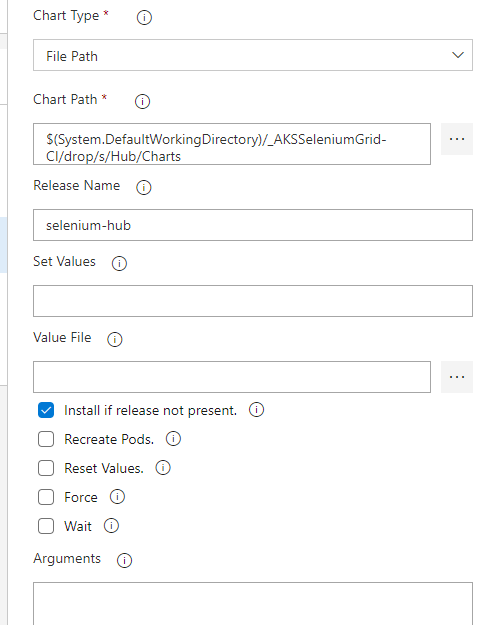
Next add the ‘Package and deploy Helm charts’ task, we are going to start by deploying the Selenium hub. Select your Azure subscription, Resource group and Kubernetes cluster as you did before. In the ‘Namespace’ box enter the namespace of your ingress controller (I’ve set mine to a pipeline variable but you can hard-code it if you want). Next set the ‘Command’ to upgrade, ‘Chart Type’ to ‘File Path’ and select the Hub Charts folder, set ‘Release Name’ to ‘selenium-hub’ and tick ‘Install if release is not present’ Your task config should look like the screenshot below.
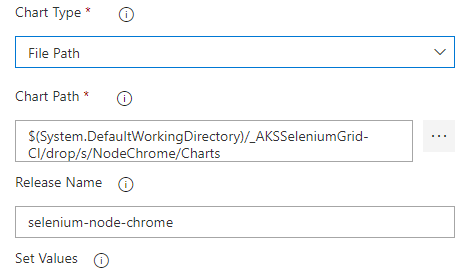
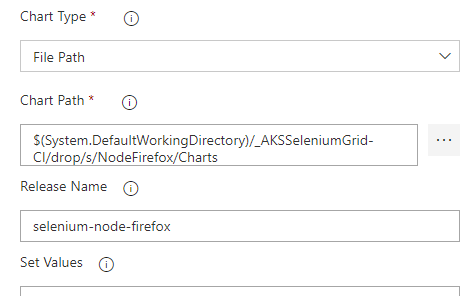
Right click the Helm task you just added and clone it twice. We are going to be deploying Chrome and Firefox nodes so we need one task each. One each task change the ‘Chart path’ to point to the chart for the node you are deploying and change the ‘Release Name’. My Chrome deploy task looks like this:
And Firefox is like this:
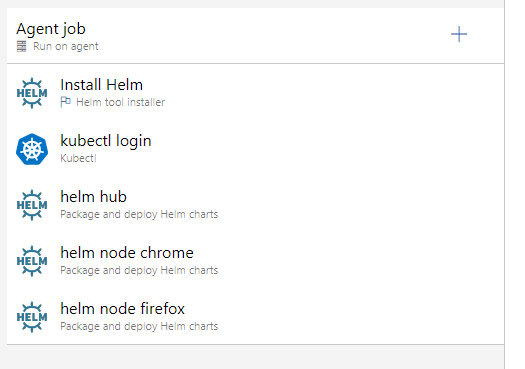
If you chose to set the namespace from a variable like I did then make sure to set that in the variables tab and that should be it. Your Release pipeline should now look like the following screenshot.
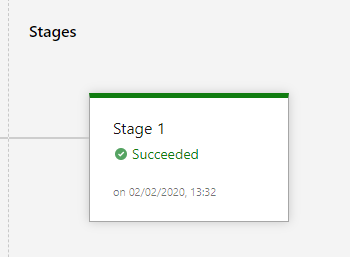
Save and then hit ‘Create release’ in the top right. After a few moments the deployment should have succeeded.
Before running tests on our Grid we need to update the ingress controller to allow us to connect to the Hub. Before that though let’s double check everything deployed correctly. Open a terminal and use kubectl to get the running pods for your namespace, with any luck you’ll see your hub pod along with two Chrome pods and two Firefox pods (my namespace is ingress-basic so substitute for your namespace name) .
kubectl get pods -n ingress-basicWe can see all our pods are successfully running.

If you see that some of your pods aren’t running and are in a ‘pending’ state. I’d guess that your Kubernetes nodes either don’t have enough memory resources or cpu resources free. You can quickly see this by running:
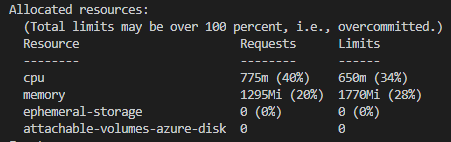
kubectl describe nodeScroll to the ‘Allocated resouces’ section and you will be able to see if you have overcommited resources, if so then your limits percentages will be greater than 100%. If this occurs you either have to increase the vm size for the instances within the scale set or deploy less replicas. If everything is within limits it should look like this:
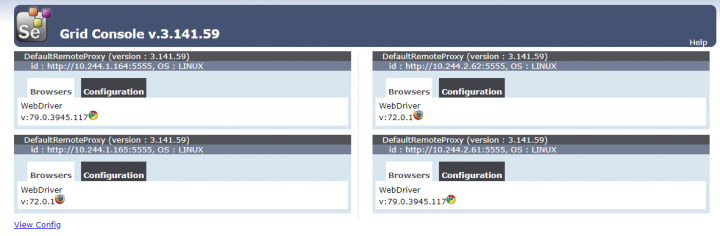
Now just configure your ingress controller by adding a rule for the hub service. Here is a sample ingress.yaml file which should point you in the right direction. Once configured you should be able to access the grid console by using the url specified in your ingress.yaml file followed by /grid/console. Hopefully it brings up the following page. I wouldn’t recommend having a publicly accessible Grid so if you’re running this in production make sure this isn’t available to the outside world.

To run tests on your Grid simply use your url followed by /wd/hub and pass this to your RemoteWebDriver instance. If you want a really simple example of running tests on Selenium Grid there is an example c# repo on my GitHub here.
Hey Tom, Great article. Do you know how we can set the maxSession for the grid?
Hi Raj,
I’ve never done it but I think you should just be able to set the max sessions env var as part of the deployment, I’ve created a gist showing how to do this below. I’ve not tested it so it might not be quite right but should get you going in the right direction. Thanks
https://gist.github.com/tomaustin700/3a7e24548e638097fa21a67042b8a14a