
This is the second article in a series exploring how to setup an Azure Kubernetes Service instance, implement a Nginx ingress controller and how to deploy apps to AKS using Helm. All the articles in the series can be found by clicking here. In this article we will use Azure DevOps to build a CI/CD pipeline to automatically update the configuration of an AKS Nginx ingress controller when changes are made to the config file.
I’m going to assume you already have a running AKS instance with a correctly configured ingress controller, if you don’t then use the first article to guide you through that process. I’m going to be using Azure DevOps to run my pipelines as it’s free for public projects, works really well and it’s what I’m familiar with – any other CI/CD pipeline should be able to accomplish what we are going to setup though.
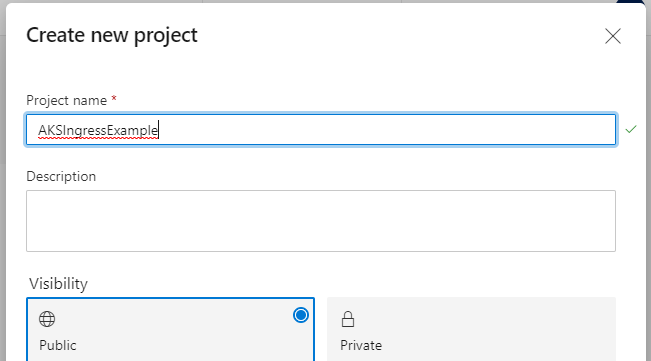
Let’s start by creating a new Azure DevOps project for our pipelines, if you already have a project ready then you can skip this step.
Once created the first thing we are going to do is setup a service connection to our AKS instance, this will allow us to communicate with it through our pipeline. Hit the cog in the bottom left to open the project settings page and click on ‘Service connections’ under ‘Pipelines’

Press ‘Create service connection and select ‘Azure Resource Manager’ for the connection type before hitting ‘Next’.

Leave the authentication method at the recommended value of ‘Service principal’ and press ‘Next’ again. On the next page set the ‘Scope level’ to ‘Subscription’ and select the subscription that your AKS instance resides within. Now select your AKS resource group – you may get prompted to authenticate then just sign in to your Azure account. Finally give the service connection a meaningful name and press ‘Save’.
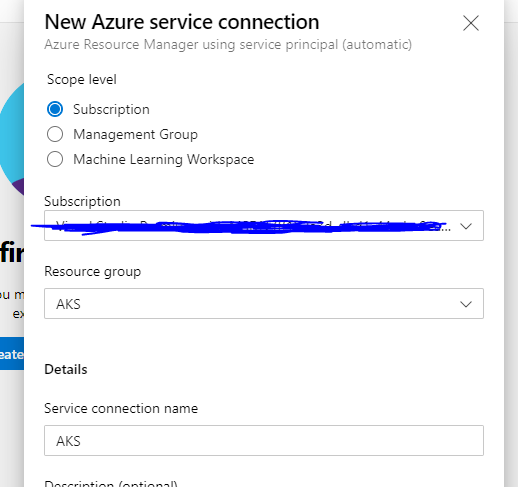
After a few seconds your service connection should be created and we can then move onto setting up the pipeline.
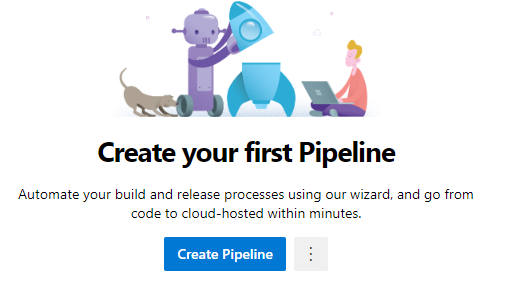
I’m going to be using yaml to declare my pipeline as I can just point a pipeline at a yaml file and all the configuration is already done. Yaml pipelines seem to be the preferred way of setting up pipelines now so if you aren’t familiar with them I suggest taking some time to investigate them further. Let’s start by navigating to Pipelines and pressing the ‘Create Pipeline’ button.
I have written a complete yaml file for the pipeline so feel free to fork my project on GitHub, you can find it here. My repository only contains two files: ingress.yaml which is the configuration for our ingress controller and azure-pipeline.yaml which is the configuration for our pipeline. When prompted where your code is select your repository location, in my case this will be ‘GitHub (YAML)’.

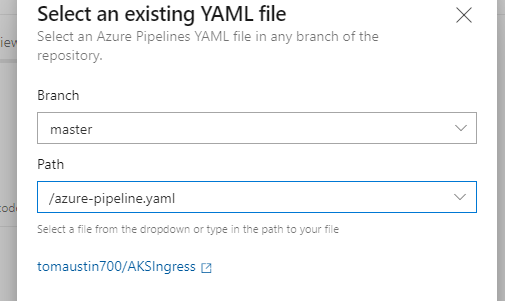
Select your GitHub repository and select ‘Existing Azure Pipelines YAML file’ when prompted.

Now point the pipeline to the azure-pipeline.yaml file and press ‘Continue’.
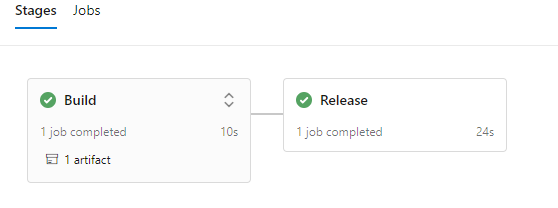
The last step is to review the pipeline and make any changes we may need to make. The file is already configured perfectly for me but you may need to change the ‘azureSubscriptionEndpoint’ parameters to match the name of the service connection you made earlier, you may also need to update ‘azureResourceGroup’ and ‘kubernetesCluster’ to match your resources. The ‘Release’ stage of the pipeline simply runs two kubectl commands: ‘Login’ which will authenticate with the instance and ‘Apply’ which will apply our new ingress configuration. Once you have finished making any changes hit ‘Run’ in the top right corner and your pipeline will start to execute.
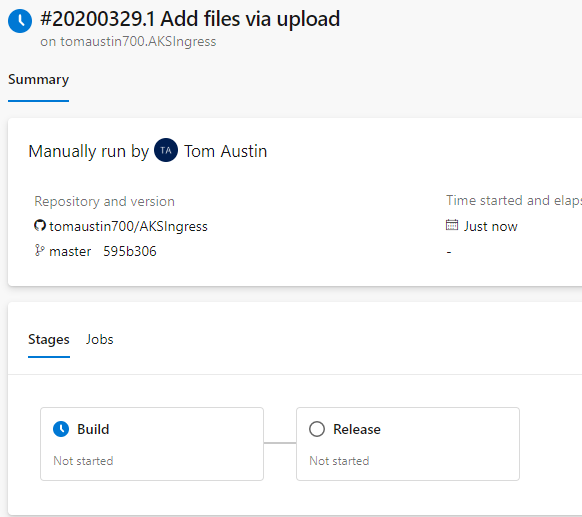
The pipeline is split into two stages: ‘Build’ which will take our ingress.yaml file and publish it and ‘Release’ which will pick up that published file and update our ingress controller with that configuration. After a few minutes your pipeline should have completed.
That’s pretty much it! Now whenever you make commit changes to ingress.yaml the pipeline will automatically update your ingress controller for you.
The final article will explore building a .NET Core application, creating a Helm chart for deployment and building a CI/CD pipeline to deploy to our AKS instance.