
This is the first article in a series which will guide you through deploying an Azure Kubernetes Service (AKS) instance on Azure with an Nginx ingress controller, configuring a CI/CD pipeline to configure that ingress controller and then deploying to the AKS instance using Azure DevOps. We are going to use the command line to deploy everything which may be daunting if you’re not familiar with it but it makes things fairly easy and we don’t have to worry about navigating the Azure UI.
Let’s start by installing the latest version of the Azure CLI. Once done open the command line tool of your choice (I’ve been really enjoying using the new Windows Terminal) and run the login command.
az loginYour default browser will hopefully open and ask you to login to your Azure account. Next let’s install kubectl which is the Kubernetes command-line tool.
az aks install-cliYou’re also going to need to have Helm installed. Helm is a package manager for kubernetes and will allow us to deploy applications to our instance, we will be using it to deploy Nginx. As of writing the latest version of Helm is v3.1.2 however get the latest version you can. To make things easier you can also add it to your Windows path, I’m not going to bother with this but if you want to there is a tutorial here.
That should be everything we need to install locally so let’s get to deploying stuff to Azure. We will start with creating a resource group for our AKS instance.
az group create --name AKS --location westeuropeYou can call it what you like, I’ve named mine AKS just so it makes this tutorial fairly easy to follow. Also you can set the location to one of your choice also. To list all the Azure locations you can run the list-locations command.
az account list-locationsNow that we have a resource group ready and waiting let’s deploy an AKS instance. I’m just going to be deploying a two node instance but you can tweak these parameters to your choosing.
az aks create --resource-group AKS --name AKS --node-count 2 --generate-ssh-keys If you get an error response mentioning ServicePrincipalProfile then wait a few minutes and re-run the command. This is a known issue and has been documented here.
Once deployed we need to get the credentials for our instance so we can start to communicate with it using kubectl.
az aks get-credentials --resource-group AKS --name AKSWe can now check everything is running correctly by running the get nodes command, this will return some data about our AKS nodes.
kubectl get nodesNow that our instance is deployed we can get to configuring it. We are going to start with creating a namespace. You can think of a namespace as a way to group pods, services and deployments together.
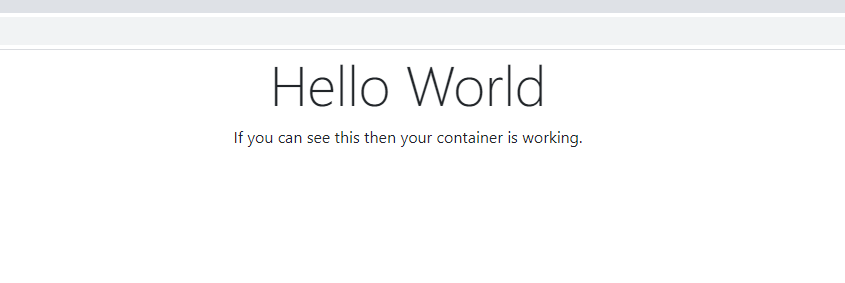
kubectl create namespace ingress-basicLet’s now deploy a container image to that namespace. I’ve put together a really basic .net core container which will simply show ‘hello world’ when accessed.
kubectl create deployment helloworld --image tomaustin/helloworldnetcore --namespace ingress-basicThis command will only deploy one pod but that should be fine for this tutorial, if you would like to learn more about deployments then the official kubernetes documentation is fairly in-depth. Once this command completes a pod will be running our image but there will be no way to access it. In order to be able to access it in the future we need to create a service for our deployment. Running the following command will create that service for us.
kubectl expose deployment helloworld --name helloworld --namespace ingress-basic --port 80Now that we have our service we need to deploy an ingress controller so we can access it. An ingress controller will direct external traffic to our service, you can find out more about ingress and kubernetes here.
Firstly we are going to deploy a static public ip in Azure, we can then point a domain name at that ip address which is needed for our ingress controller. When we deployed our AKS instance it created a second resource group and deployed the nodes within it so we need to retrieve the name of that resource group, we can do that with the following command.
az aks show --resource-group AKS --name AKS --query nodeResourceGroup -o tsvMine came out as ‘MC_AKS_AKS_westeurope’ so hopefully yours will be fairly similar. Let’s now deploy a public ip address to Azure (substitute MC_AKS_AKS_westeurope with the resource group name returned by the previous command). This command will return the IP address so keep a note of that for future use.
az network public-ip create --resource-group MC_AKS_AKS_westeurope --name AKSPublicIP --sku Standard --allocation-method static --query publicIp.ipAddress -o tsvNow we’re going to run a few Helm commands. I’m going to cd into my Helm folder but if you added Helm to your Windows path variable then ignore the .\ at the start of the Helm commands.
Let’s start by adding the stable charts repo. This will allow us to pull Helm charts from that repository.
.\helm repo add stable https://kubernetes-charts.storage.googleapis.com/Run repo update to get the latest information about those charts.
.\helm repo updateWe can now deploy Nginx to our AKS instance using Helm. Make sure you set the namespace parameter to the same one you created earlier. Set the loadBalancerIP parameter the the IP address of your Azure public IP.
.\helm install nginx-ingress stable/nginx-ingress --namespace ingress-basic --set controller.replicaCount=2 --set controller.nodeSelector."beta\.kubernetes\.io/os"=linux --set defaultBackend.nodeSelector."beta\.kubernetes\.io/os"=linux --set controller.service.loadBalancerIP="51.105.209.106"Once completed we can check Nginx has deployed successfully by running the following command:
kubectl get service -l app=nginx-ingress --namespace ingress-basicNow that we have a running ingress controller we need to assign a dns name to our Azure public IP – this is then used by Nginx to direct traffic to our deployment. Make sure you update the IP address in the following command to the one you created earlier, also take note of the –dns-name parameter and set it to something unique.
az network public-ip update --ids (az network public-ip list --query "[?ipAddress!=null]|[?contains(ipAddress, '51.105.209.106')].[id]" --output tsv) --dns-name akstomaustinThis created me a DNS address of ‘akstomaustin.westeurope.cloudapp.azure.com’ and yours should be fairly similar.
The last thing we need to do is apply configuration to our ingress controller. To do this we are going to use a local yaml file, a future article I will show you how to apply ingress configuration using an Azure DevOps Pipeline but applying it locally is fine for now. I have created a sample ingress.yaml file for you which you can find here, simply save this file locally as ingress.yaml and update the host parameter with the dns address you just created. Now all we need to do is apply that file using the kubectl apply command.
kubectl apply -f C:\Users\Tom\Desktop\ingress.yaml --namespace ingress-basicOnce applied you should finally be able to access your deployment by putting the DNS address into your browsers address bar and hitting enter! Hopefully you get the following response:
Congratulations!
This is all working over HTTP and really we want HTTPS. There are a few ways you can configure HTTPS; I normally use Cloudflare which makes things nice and easy however you can also use Let’s Encrypt and run cert-manager within AKS. Both of these approaches are outside the scope of this tutorial and there are many well written guides for both approaches which can be found with a quick google search 🙂
excellent work. clear and concise. really helped get me a working example i can learn from. great job dude!