
Parts 1, 2 and 3 of this series can be found at the following locations: Part 1, Part 2 and Part 3.
This is the final article in this series covering how to install Bosun in a production environment. The previous articles showed you how to install Bosun, configure TSDBRelay to relay and aggregate data and then run TSDBRelay in a load balanced configuration using HAProxy. This final article will guide you through installing Scollector on your servers to collect metrics for Bosun. Scollector is a metric collection agent and has collectors for Linux, Darwin and Windows. We are going to be installing it on our Bosun server as well as our TSDBRelay instances and our HAProxy instance. The installations steps will be identical on every server as all of our existing servers are Ubuntu 18.04 so I will only go through the process once but do make sure you install it on every server. If you do want to install Scollector on a Windows box I already have a tutorial showing how to do that here.
We are going to need to install GO and then Supervisor before we can install and configure Scollector and these steps are identical to those carried out in the first and second article so if you are wanting to install Scollector on a server which already has GO and Supervisor installed skip to the ‘Pull Scollector from Github’ section.
Install GO
You will only need to install GO on your HAProxy instance as our Bosun and TSDBRelay servers already have GO installed.
Scollector requires version 1.11.2 of Go to run so the first thing we need is download that version and install it. If you have followed the steps to install Bosun and TSDBRelay you should be familiar with these commands by now. SSH into your HAProxy server and run the following commands:
curl -O https://dl.google.com/go/go1.11.2.linux-amd64.tar.gztar -xvf go1.11.2.linux-amd64.tar.gz sudo mv go /usr/localsudo nano ~/.profileAdd the following to the end of the file then save and exit (ctrl+o, enter, ctrl+x)
export GOPATH=$HOME/work
export PATH=$PATH:/usr/local/go/bin:$GOPATH/bin
One last command now before GO should be installed:
source ~/.profileTo check everything worked correctly we can run ‘go version’ and check the response:
go versionAnd we should get:
go version go1.11.2 linux/amd64Install Supervisor
Like when we installed TSDBRelay we are going to use Supervisor to control the Scollector process. Install Supervisor with the following command:
sudo apt-get install supervisorPull Scollector from Github
Like when we have previously pulled from Github we are going to start by creating a directory for Scollector before using Wget to download Scollector.
sudo mkdir -m 777 /scollectorsudo wget -O /scollector/scollector https://github.com/bosun-monitor/bosun/releases/download/0.8.0-preview/scollector-linux-amd64Now we can use chmod to mark Scollector as executable.
sudo chmod +x /scollector/scollectorNow we need to create our scollector.toml configuration file, normally you wont need to do this however if you are wanting to gather HAProxy metrics it is needed – skip this step if you are not requiring those.
sudo nano /scollector/scollector.tomlEnter the following into the file, this will instruct Scollector to gather HAProxy metrics.
[[HAProxy]]
  User = "admin"
  Password = "pass"
  [[HAProxy.Instances]]
    Tier = "1"
    URL = "http://0.0.0.0/haproxy?stats;csv"
Create a Supervisor file to run Scollector
Just like when we have previously used Supervisor to run Bosun and TSDBRelay we are going to create a configuration file to run Scollector.
sudo nano /etc/supervisor/conf.d/scollector.confHere is a basic config file for you to use. The ip address after -h is the address of our HAProxy instance (0.0.0.0 in this case as we are installing Scollector on the HAProxy server). You don’t need to specify the location of the scollector.toml file as it will be auto detected if it is in the same location as Scollector.
Now let’s tell supervisor to reread and update
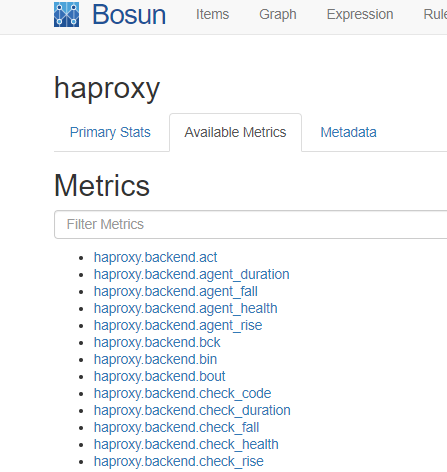
sudo supervisorctl rereadsudo supervisorctl updateThat should be it for HAProxy. If we navigate to Bosun we should see HAProxy under the list of hosts, if we then click on the server and navigate to ‘Available Metrics’ we should see our HAProxy data.
Now repeat these steps on your other servers. Remember that if you are only wanting system metrics and nothing bespoke you don’t need to specify the scollector.toml file.
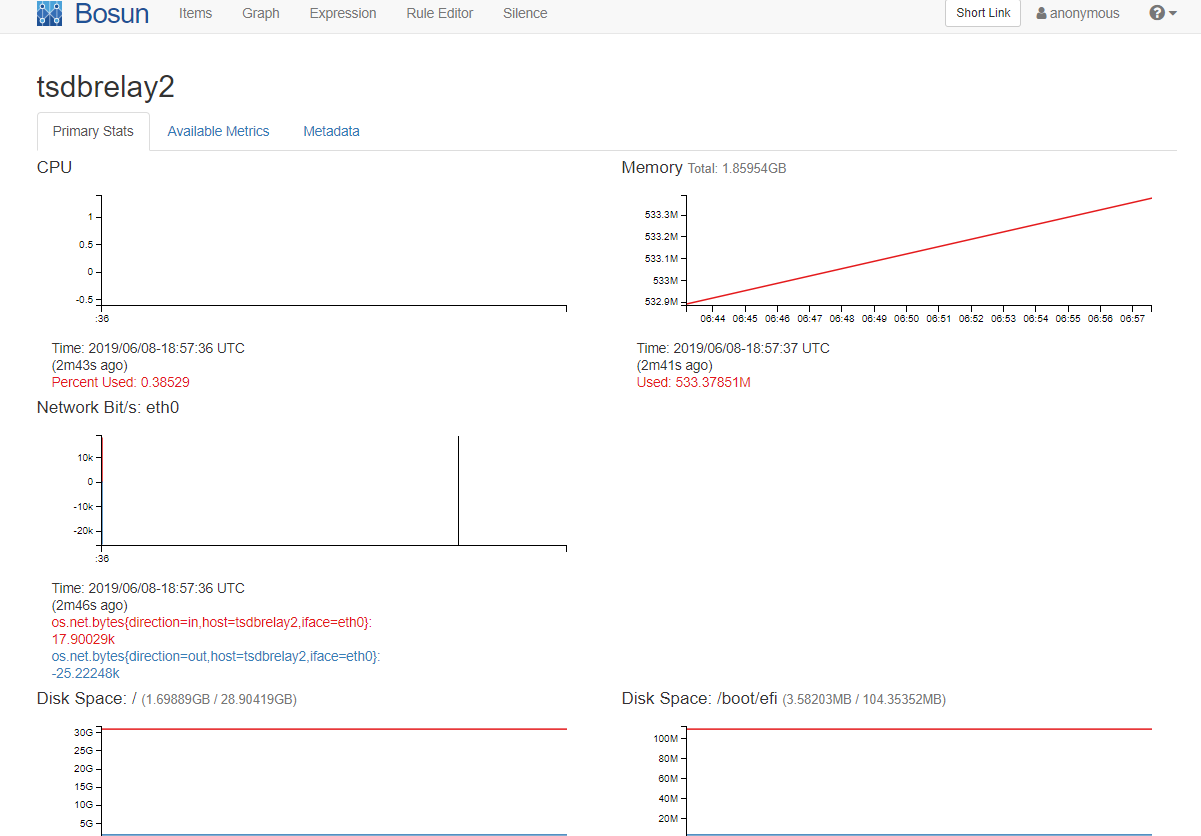
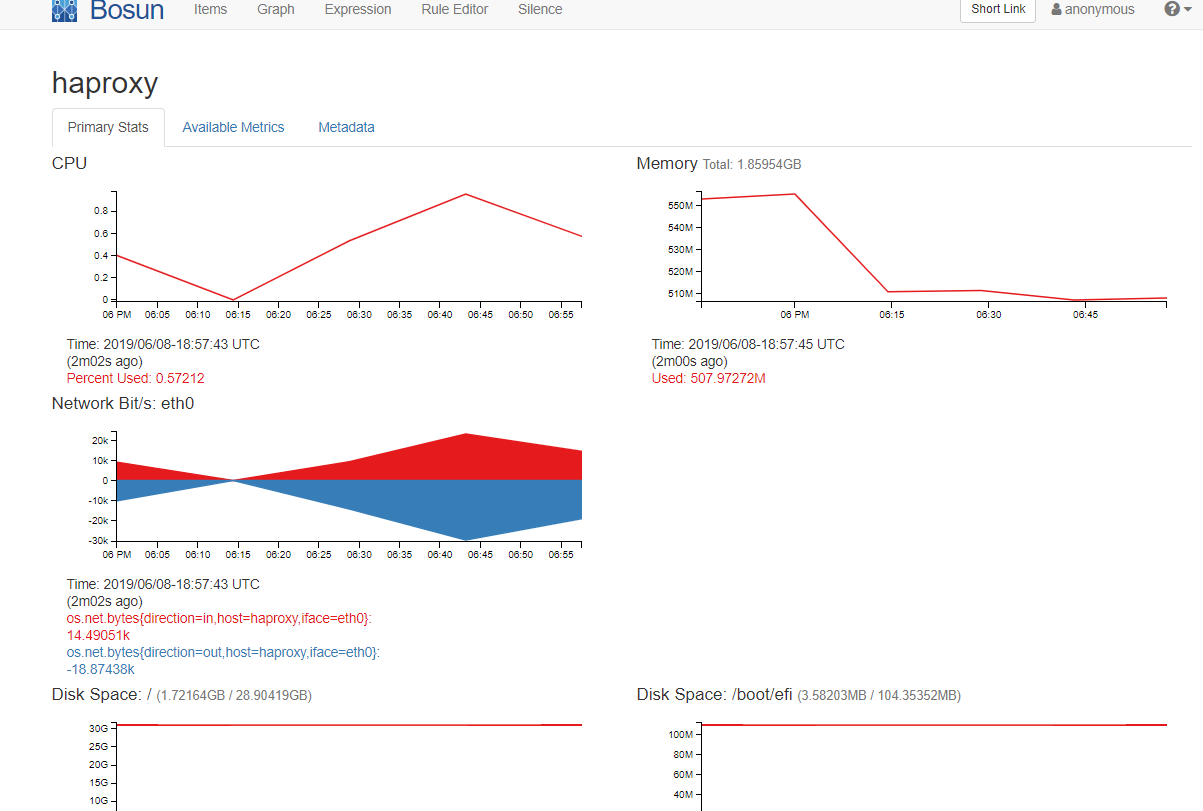
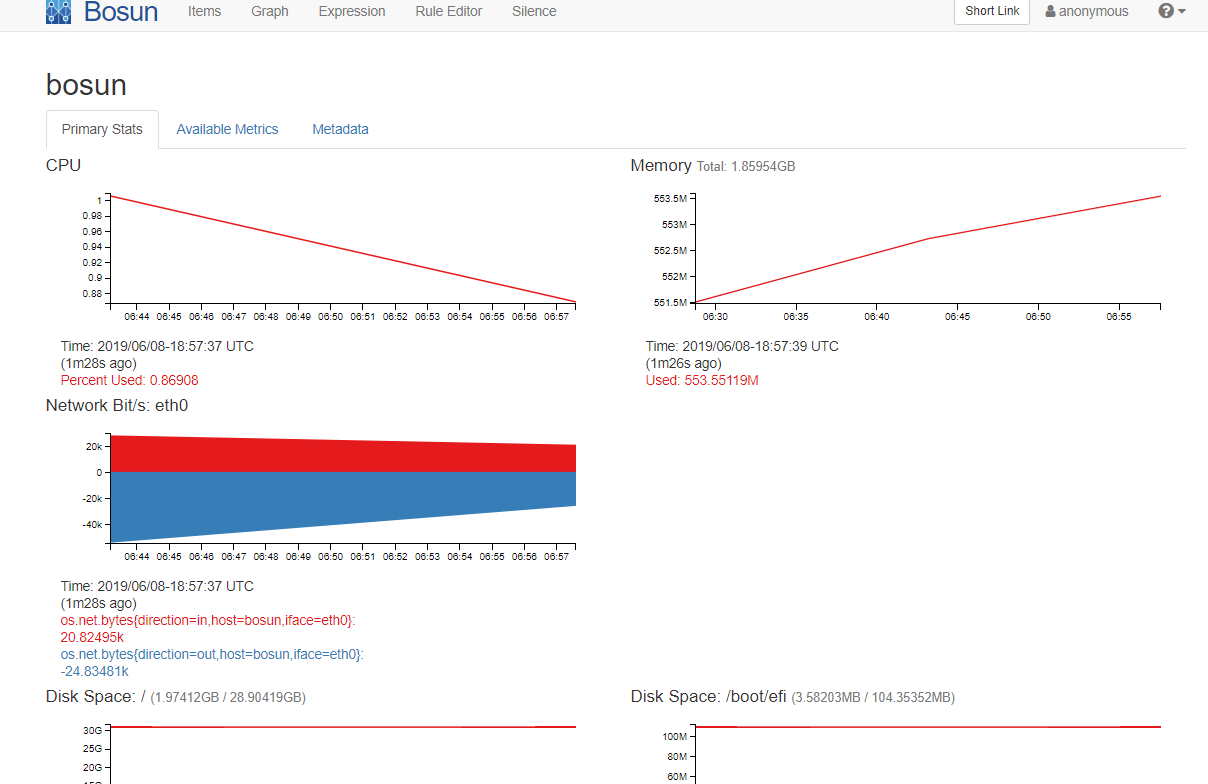
Once done you should now be able to see a whole host of metrics from all your servers within Bosun. You can now start creating expressions to view this data and add rules using the Rule Editor to alert you when things are going wrong.

If you would like to build the entire environment in Azure here are the template files to allow you to do that easily. I hope this series helped you and if you need help or have any questions please leave a comment.