
This article is the second in a series exploring AKS and how to leverage Azure DevOps to easily deploy and update services running inside AKS. The first article in the series can be found here and guided you through deploying a simple website to AKS, this article will show you how to do the same but with an API.
I’m going to assume you already have a Kubernetes cluster running in Azure and you are already familiar with Azure DevOps pipelines, if not then please go back and read the first article which covers these steps in detail.
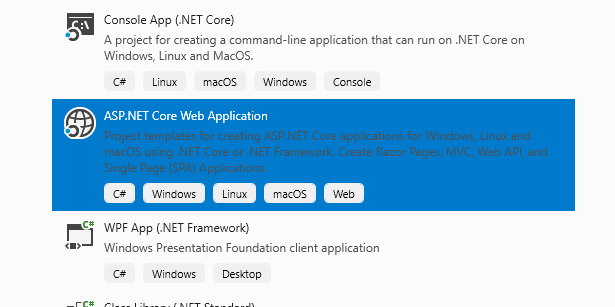
Let’s start by opening Visual Studio and creating a new ASP.Net Core Web Application using the built in template.
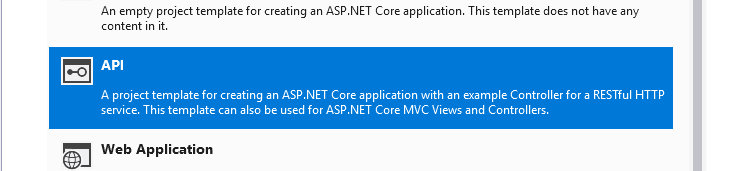
When prompted we are going to select API, make sure that ‘Enable Docker Support’ is ticked and the mode is set to ‘Linux’. I’m going to leave Authentication set to ‘No Authentication’ as this is just going to be a very basic API for the purposes of this tutorial.
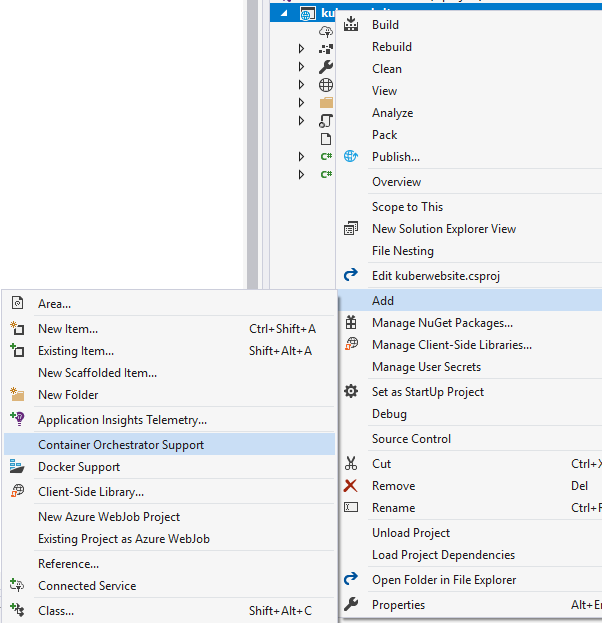
Once created we should have a very basic API with a basic controller (ValuesController). Let’s right click on the project and add ‘Container Orchestrator Support’, make sure ‘Kubernetes/Helm’ is selected.
So far this is identical to the process of adding a website, we’re even going to configure our helm files to be the same. The files generated by Visual Studio are a good starting point but I’d recommend using the basic yaml files I have put together (values.yaml can be found here and ingress.yaml here – remember to replace website/kuberwebsite with your API’s name), for deployment.yaml things are slightly different.
Deployment.yaml contains definitions for two probes (readiness and liveness) which are used by Kubernetes to detect if everything is working correctly and if not trigger a restart of the container. We need to point these to our controller, if not Kubernetes will not get a response and the API will constantly be restarted. Update the probes to look like this:
livenessProbe:
            httpGet:
              path: /api/values
              port: http
          readinessProbe:
            httpGet:
              path: /api/values
              port: http
If you are doing this for real I’d recommend creating a ‘health’ controller which is dedicated to informing Kubernetes that everything is okay. The full copy of my deployment.yaml file can be found here (I’ve also declared some environment variables for Application Insights but you don’t need those).
Once done push your code to Azure DevOps like we did in the previous tutorial and construct your pipelines identically (I’d even recommend just cloning the pipelines we made before and changing the repo and the environment variables). That should be it!
We have been using HTTP application routing provided by Azure to access our website/api but the next tutorial will focus on deploying our our NGINX Ingress controller which will leverage Let’s Encrypt for HTTPS – this will all be declared in code and deployed using Azure DevOps (of course!).