I recently stumbled across this interesting write-up by Nick Craver about how Stack Overflow do their monitoring. If you have any interest in DevOps or infrastructure in general I highly recommend giving it a read. One section caught my eye… Bosun.
Bosun is a data collection tool for metrics and meta data, if you’ve read any of my previous posts you will have seen my post about the metric gathering package I wrote called Metricity. I started writing Metricity because I couldn’t find anything which could collect metrics of my choosing and store them somewhere on an internal network. Metricity worked but you had to spin up your own sql database to store the data and there was no UI for analysing and viewing the data (I did start writing a website using Vue which could show the data but that’s for another post). Bosun does everything Metricity can and more!
By default Bosun can record metrics from servers (cpu load, clock speed, hdd capactity, etc) which is useful but the feature which really caught my eye was its C# Nuget package called Bosun Reporter. Bosun Reporter allows any data to be sent to Bosun from within your application, I decided I had to test this out so the first thing to do was spin up a Bosun server.
The Bosun homepage has an excellent quick start guide which covers how to install the server using Docker, something to be aware of is that running Bosun from a Docker container is not currently supported in production environments. This is fine for me but they do provide versions for pretty much every operating system here. I have been meaning to get into Docker for a while so this seemed like a great time to spin up a new Ubuntu server, install Docker and pull the latest Bosun version from the Docker Registry.
I followed the quick start guide and quickly had Docker installed and Bosun running – that was easy! If you want to do this yourself without following the guide simply select Docker when prompted during the Ubuntu installation (this became an option on 18.10). Once installation has finished run:
docker run -d -p 4242:4242 -p 8070:8070 stackexchange/bosun:0.6.0-pre
This differs ever so slightly from the quick start guide as the guide uses version 0.5.0 which I did try at first but various features were missing. After a quick chat in the Bosun slack I was told to try the 0.6.0 pre release which had everything I needed. The instance should start and you should be able to access your server using the IP of your Docker server and the port number (in our case 8070). You should be greeted with the following:

At this point I do suggest going through the quick start guide as it explains in excellent detail all the features and workflow. From this point I will assume your fairly familiar with the UI (there isn’t much to it!).
Because I wanted to see how easy it was to push data from Bosun Reporter I made a new C# console application and installed Bosun Reporter. If you want to skip ahead and see the finished code then it’s on my GitHub here but I will go into the details a bit here.
The first thing to do is create a Metrics Collector and setup the connection and setting.
It is recommended that the collector is made static, you would then initilise it when your application loads up. Now that we have collector setup we can start collecting some metrics! I am only going to go into recording metrics using EventGauge however Bosun Reporter supports several different ways of collecting data, these are explained in detail within the documentation.
For this example I have created a simple console application that calls an API to get the weather for London, we will then measure the response time and log it in Bosun. We first need to create the metric we want to use for recording, this is as simple as calling CreateMetric.
We have to specify a few parameters to give Bosun some context to what we are collecting, in our case GetWeather corresponds to the metric name, time taken is the unit of measurement and the last parameter is a short description of what’s being collected. Adding data to the GetWeather metric is as simple as calling .Record and passing in the data you want to record. To make things a bit more reusable I wrapped up the recording in a Time method which accepts a Func<Task> as a parameter along with the EventGuage we made earlier. This method is called in the following way:
In order to record the length of time the Func<Task> takes to execute we first create a stopwatch and start it, then we Invoke our method, stop the stopwatch and finally record our data in our metric.
In my application I have setup a simple ElaspedEventHandler which then calls the Time method every 5 seconds which has the GetWeather method passed into it. This is just to get some data into Bosun so we can have a look at what we get. We can now run our application and start generating some data. Something to be aware of is by default Bosun Reporter will only submit data every 30 seconds (this is a nice touch as it stops us spamming Bosun), this can be tweaked by changing the SnapshotInterval parameter of the MetricsCollector.
Now if we open Bosun and have a look hopefully we should start seeing some data rolling in. The first thing we should notice is that under Items and then Hosts we should see our device name.
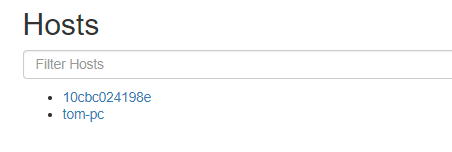
So far so good! 10cbc024198e is the name of the Bosun server and tom-pc is what we are running our application on. If we then click that device name and select Available Metrics we should see our data.
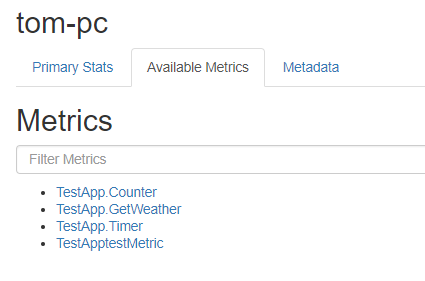
TestApp.GetWeather is the data we have pushed! As you can see I tried a few of the other data gathering features of Bosun Reporter but lets dive deeper into GetWeather.

We are presented with a nice graph showing our response time in ms and the interval of our API requests. From this we could then create an expression and use that to create an alert, this could then email us if a response took longer than our average response time. That’s just one example but Bosun supports all sorts of operators and aggregation techniques. I suggest checking out the documentation for a deeper dive into Bosun’s expression language. All of the source code for the example I created for this can be found here and I suggest you give Bosun and Bosun Reporter a try for youself!