I recently bought a domain name and needed email to go with it, after some research I decided to use GSuite as I’ve used Gmail for years and it has the added benefit of unlimited drive storage. This post should guide you through the steps needed to get GSuite connected to your domain and email up and running.
1: Buy domain name
I used 1and1 to buy my domain as they seemed the cheapest at the time. It shouldn’t matter where you got the domain from so don’t worry too much about that.
2: Setup DNS
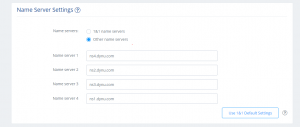
My webserver is hosted at home which means I don’t have a static IP address, to stop this being a problem I used Dynu for dynamic dns. I have used No-IP for years however they don’t allow connecting to custom domains for free. To point the domain towards dynu I created an account there and then set the nameserver in the 1&1 control panel.

3: Setup GSuite
Now dns is working we can connect GSuite to our domain. Start with navigating to the GSuite homepage and press the Get Started button in the top right. You should be able to follow the wizard through as it is fairly self explanatory, if you are only going to be using it for yourself you should select ‘Just You’ on the about page.

When you get to this page select ‘Yes, I have one I can use’


Press next and fill in the details on the next few prompts and then continue to setup. When prompted if you want to add people just click ‘I have added all user email addresses currrently using …’
When you get to the verify domain section go back to dynu, click manage dns and add an TXT record (you can do this in the DNS records settings panel) and also setup the MX records. Once done your MX Records page should look something like this

Once that is done google should verify correctly and you should now be able to use GSuite for your email and utilise the unlimited drive storage which comes with GSuite.